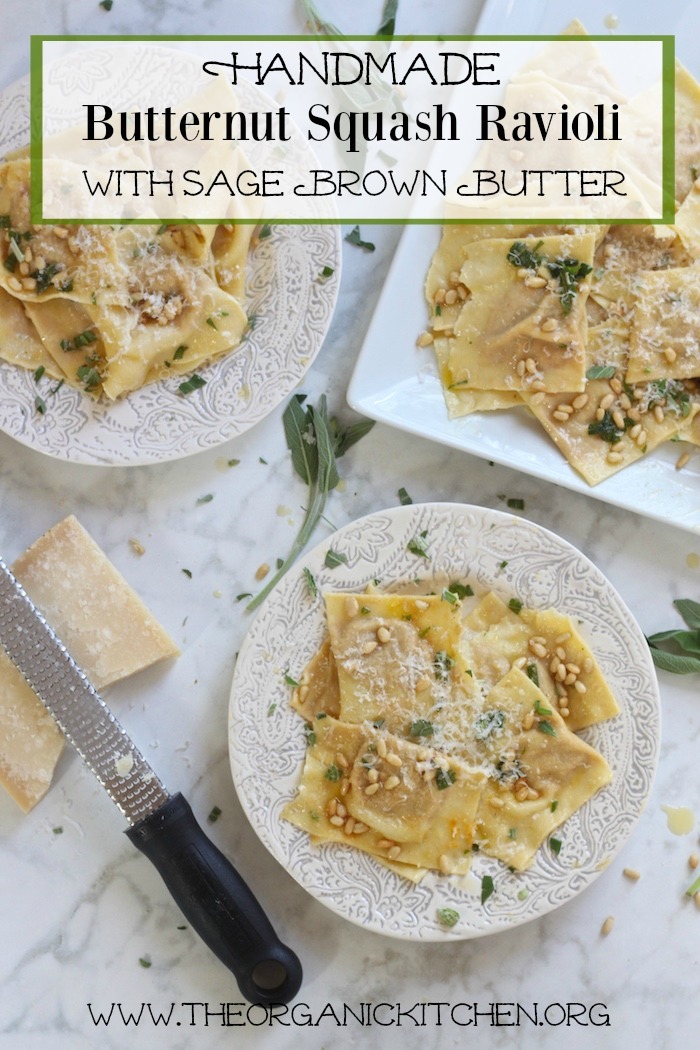
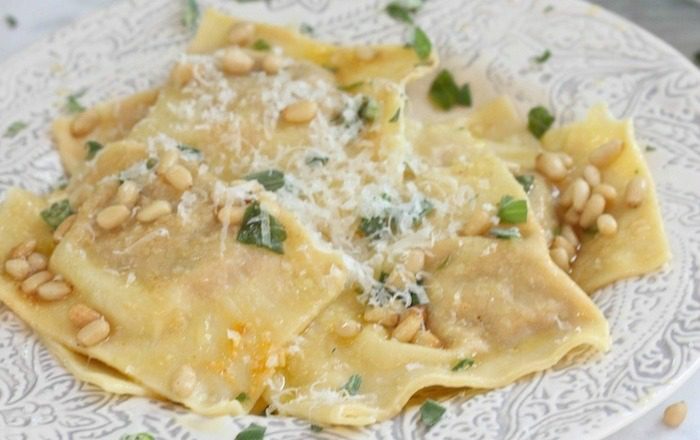
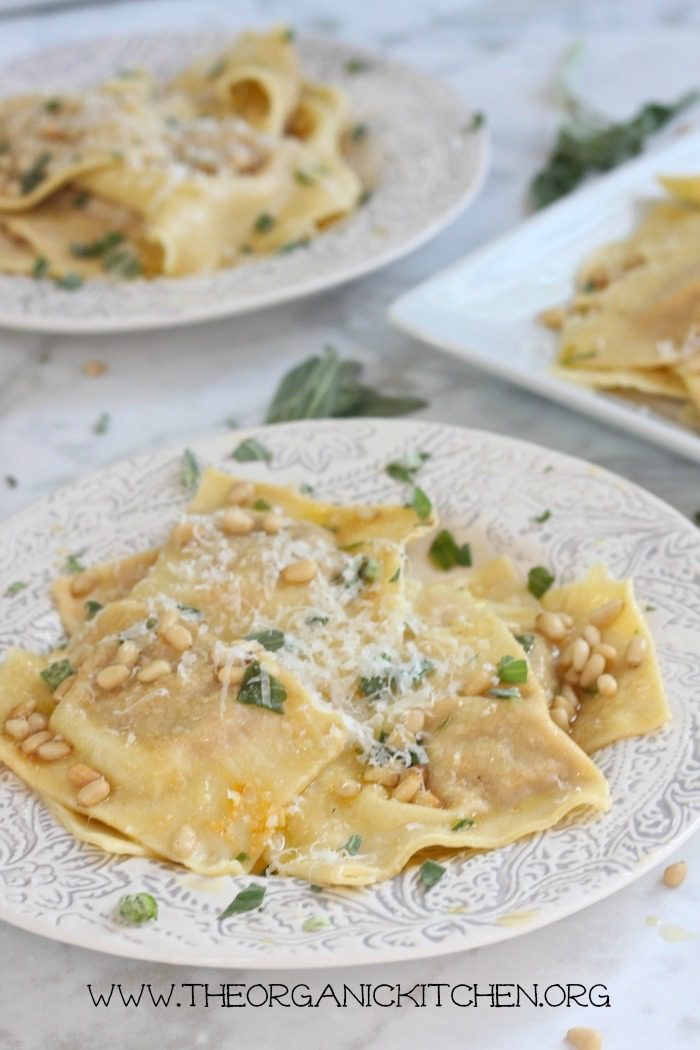
If I committed a terrible crime and were on death row heading for the electric chair and the warden asked me what I wanted for my last meal, this would be it. That said, I would have to make it myself…I have yet to find a restaurant version of Butternut Squash Ravioli with Sage Brown Butter that is better than this one so I doubt a prison cook is going to do a good enough job. Look at this delicate pasta, filled with roasted butternut squash, garlic, pine nuts and Parmesan. Exquisite! (complete printable recipe below)
(This post contains affiliate links. I may make a commission from sales but your price remains the same.)
Just a Note:
I must say before we get started that this recipe is for the cook that loves a challenge! It is a little labor intensive…but I swear it is worth the time investment. Handmade pasta is so delicate and this filling is downright incredible. So put on some good music, clear a work space and if possible grab a friend. Pasta making is more fun with a partner!
Making Handmade Pasta:
There will be a lot of photos in this post because a picture is worth a thousand words, it will far easier to follow the instructions if you see the process first. We start by making the pasta. Flour, eggs, and a little olive oil is all you need. Combine in a bowl, this may take a few minutes. Once combined turn out on a floured surface and begin kneading.

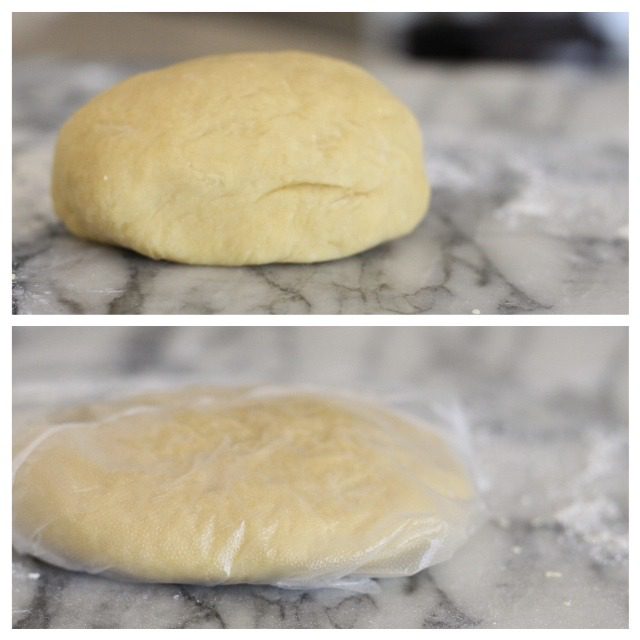
Knead until dough is smooth and elastic, it should feel like play dough. Kneading takes about 8 minutes. Cover and chill in the fridge for about an hour.
While the Dough is a Chillin’ Make the Fillin’…
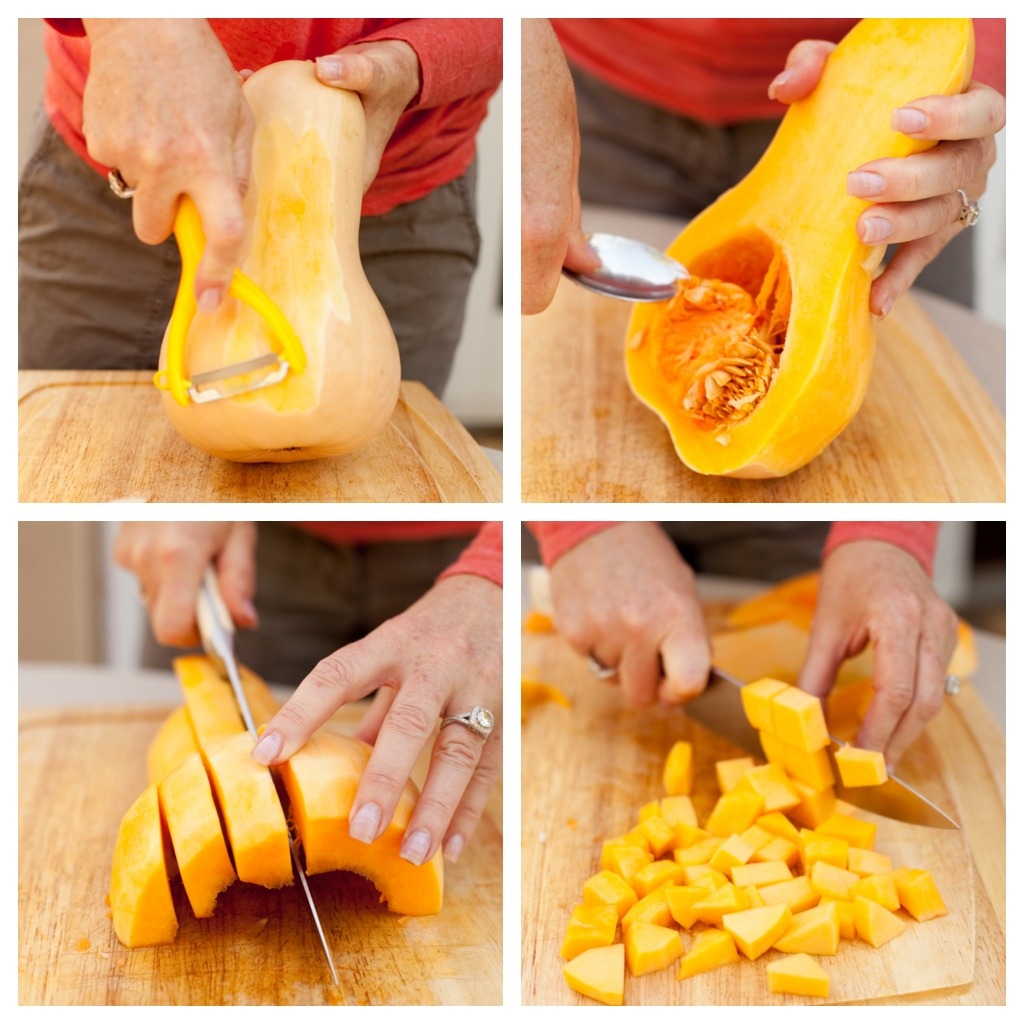
Working with butternut squash can be a challenge if you don’t have the correct tools. You need a ‘y’ peeler and a sharp knife. Of course you can always use a fresh, good quality, pre-cut butternut squash.
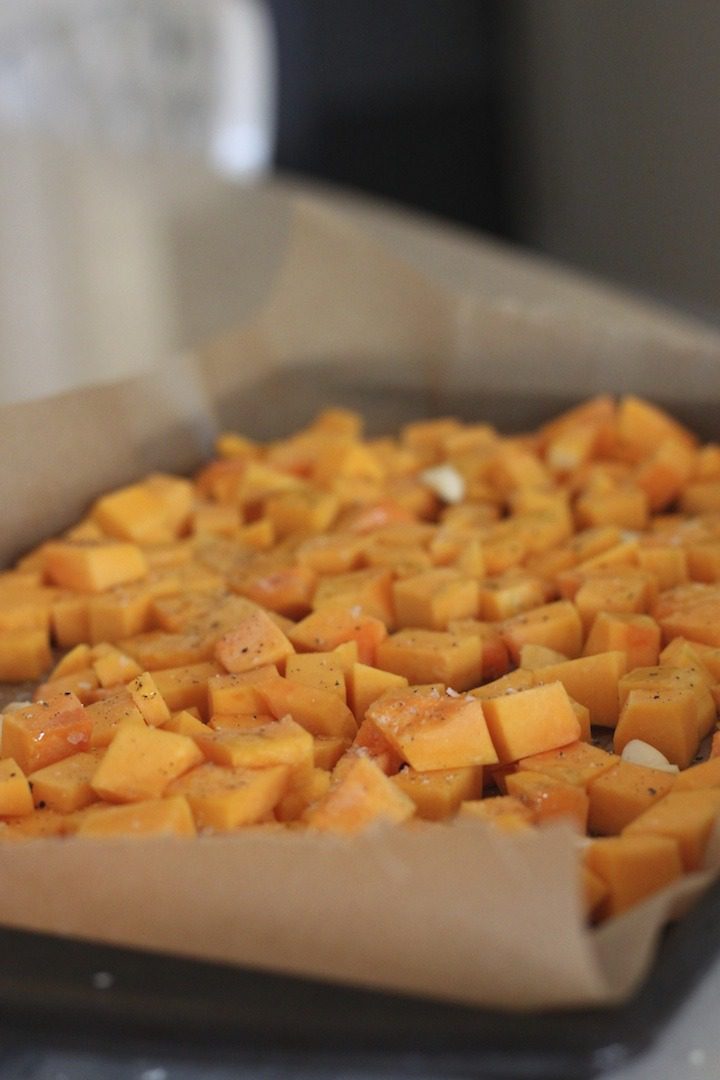
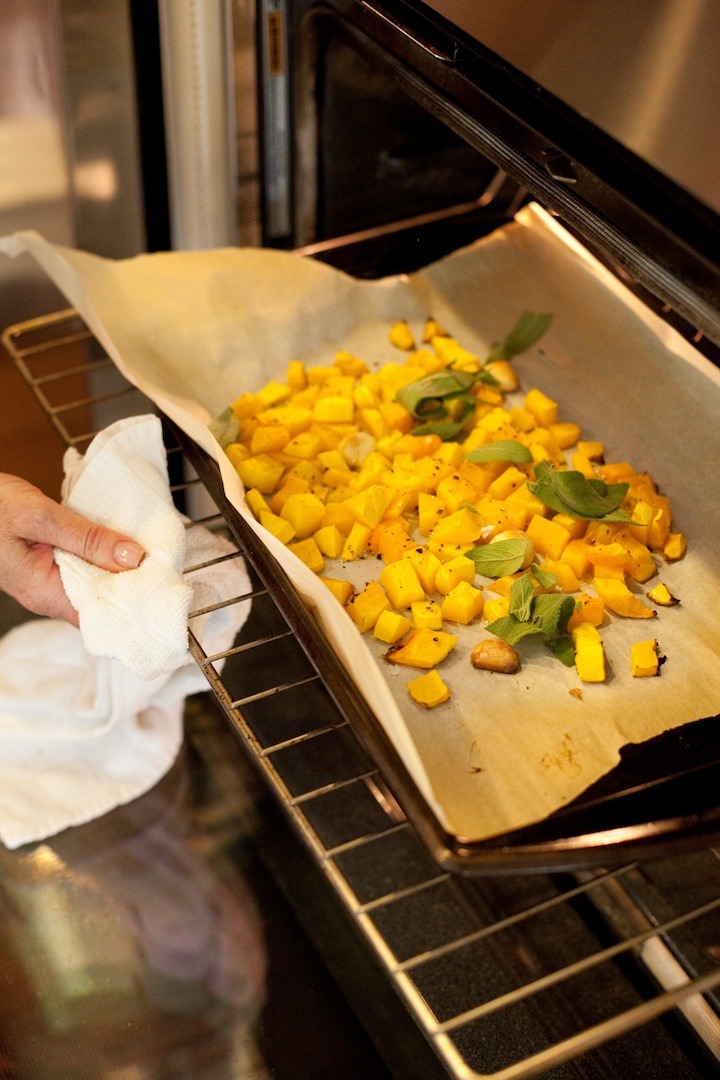
I roast the butternut squash and garlic on a rimmed cookie sheet lined with parchment paper. It makes for easy clean up!
Then I add fresh sage the last ten minutes of cooking. (your cookie sheet should be full, in this picture I was making a half batch)
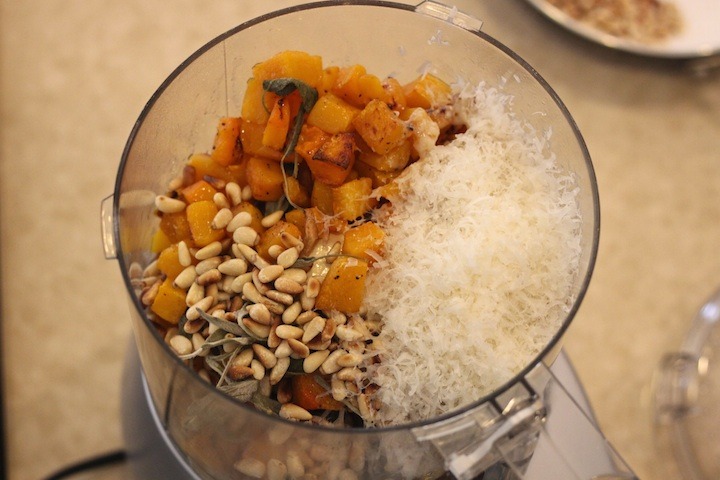
The filling goes in the food processor with pine nuts and parmesan.
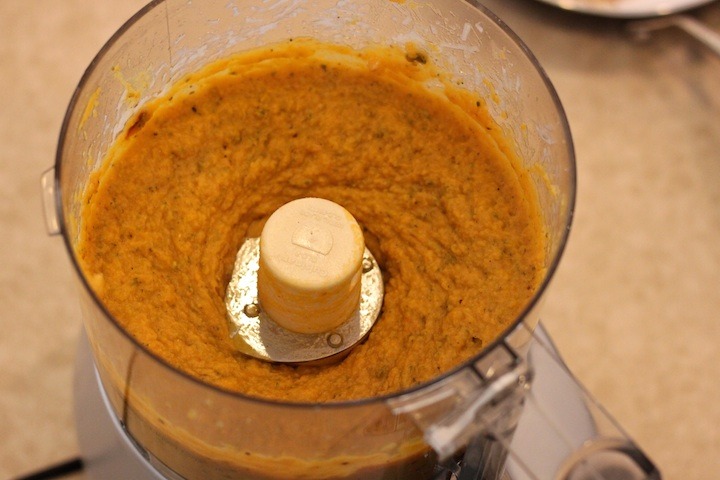
Give it whirl…
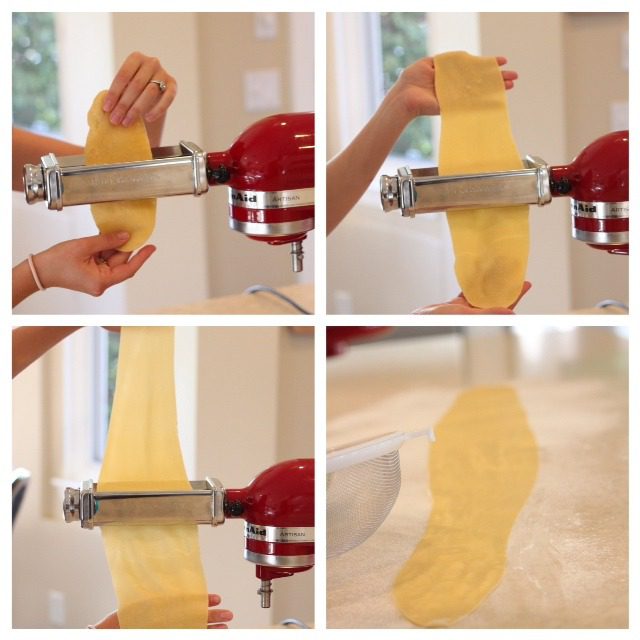
Roll out the Pasta:
I use a pasta roller attachment for my kitchen aid, it’s perfect for making pasta alone.(To see more pasta attachments click here) If this isn’t in your budget you can use a hand crank pasta maker , just know you need a friend to help. If you use the hand crank version someone needs to crank while the other feeds the pasta through the maker. Place rolled out pasta onto a well floured surface. I use a screen colander to sprinkle flour on my counter.
Place small spoonfuls (about 2 teaspoons) of filling just below the midline of pasta, spacing the filling about two finger widths apart.
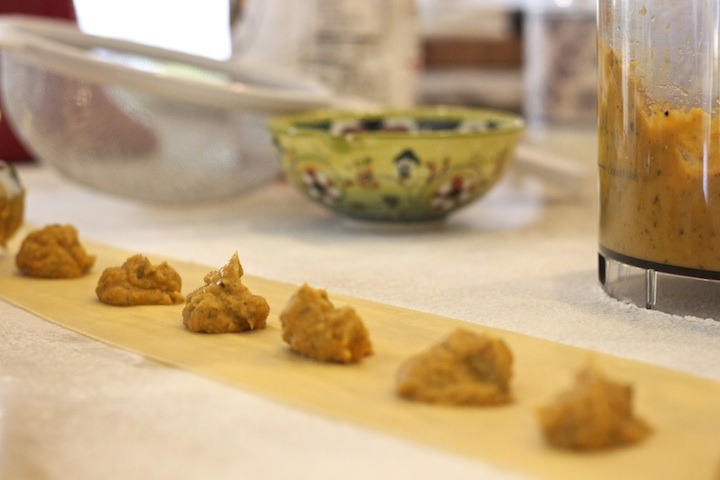
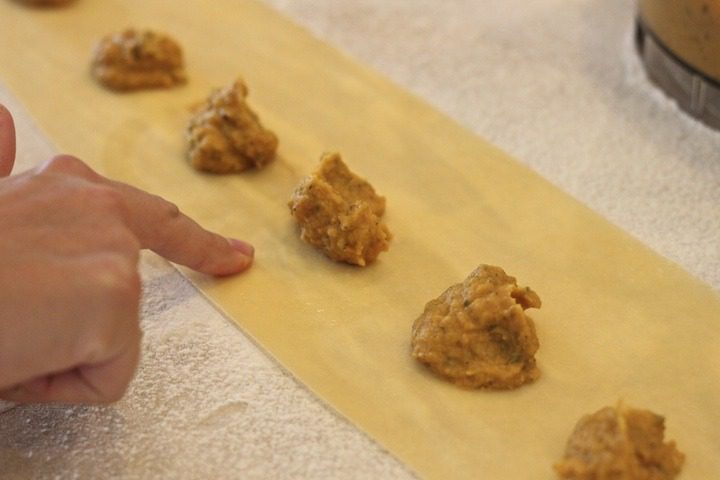
Then dip your finger into water and make a ‘u’ with the water under each scoop of filling. The water will act as glue to hold the pasta together during cooking.
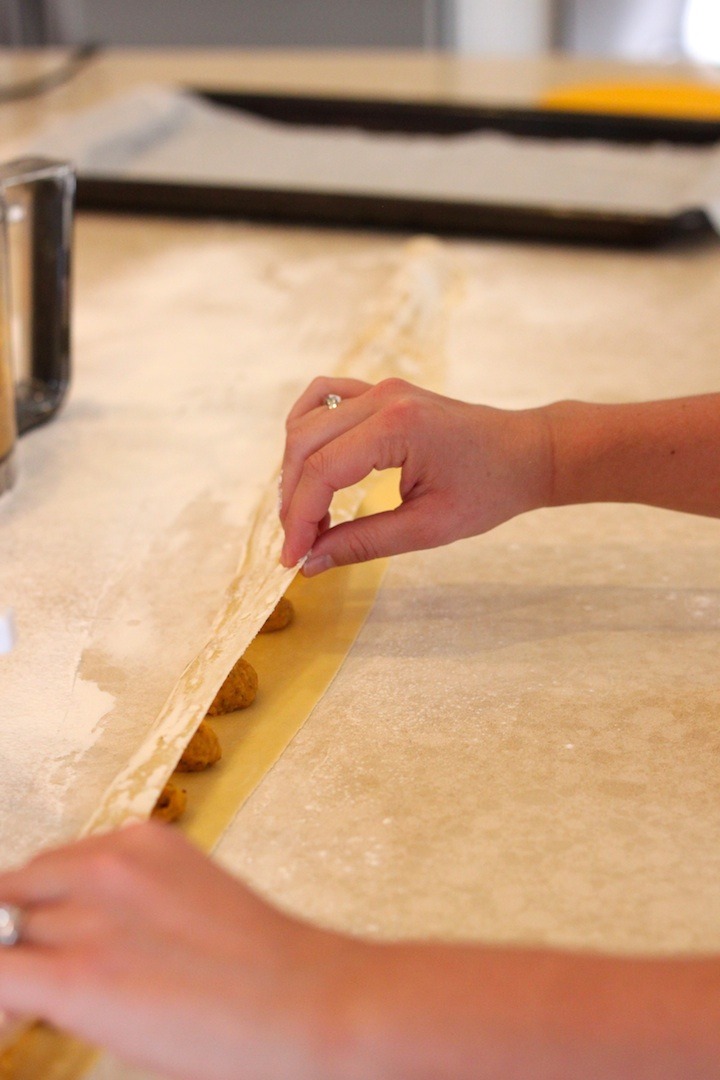
Fold pasta over so ends meet.
Then use two fingers to press the pasta together, starting on the sides of each scoop of filling and then seal underneath. This helps eliminate air bubbles.
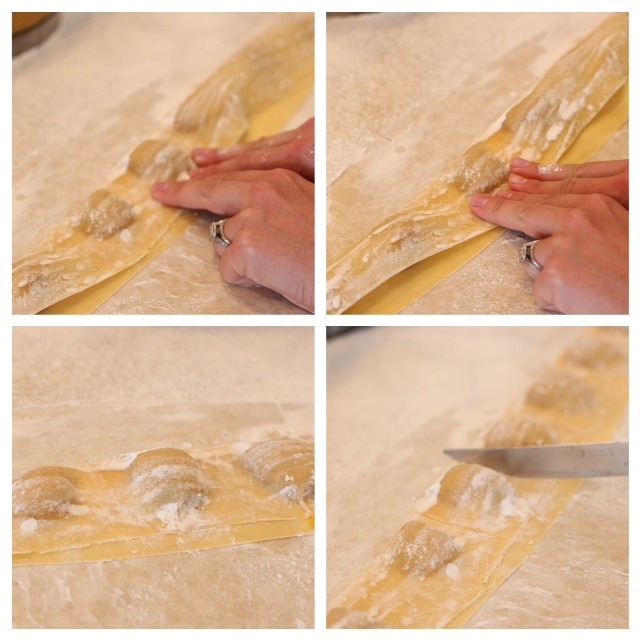
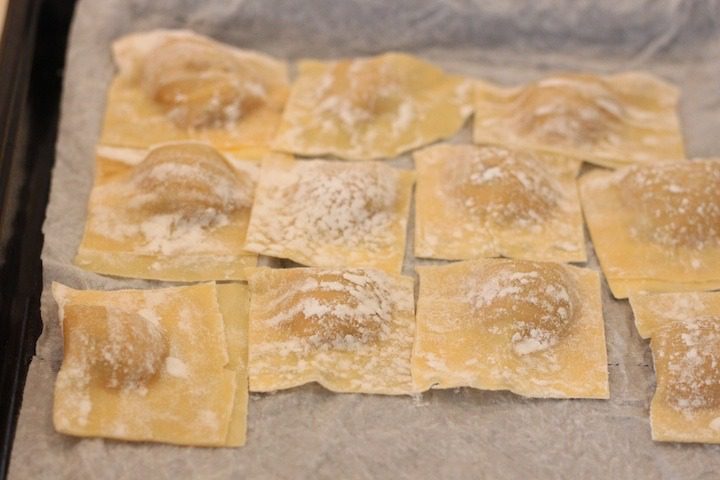
Use a knife to gently cut ravioli into squares. I roll on my Caesarstone and have never scratched it doing this, but if you are worried use another surface. Place raviolis atop wax paper in a single layer, placing sheets of wax paper between layers as the sheet fills up. Make a 2nd, 3rd and possibly 4th batch of pasta.
Browning Butter:
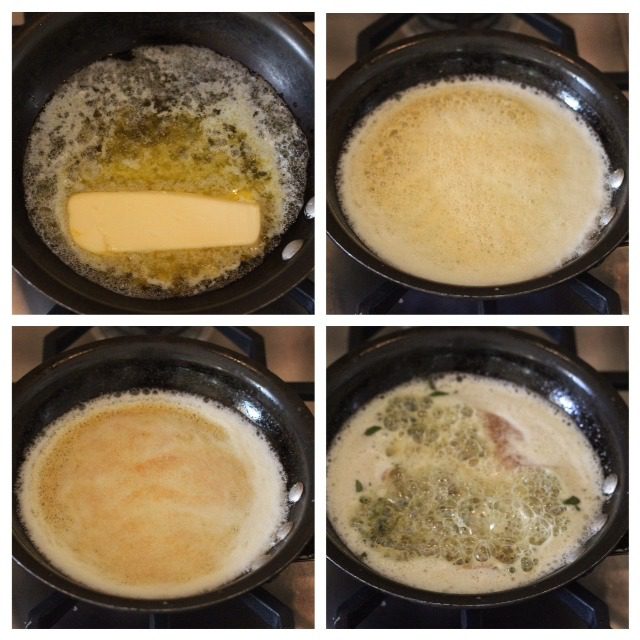
Place one stick butter into a small pan on medium heat, butter will melt, then begin to bubble up. Stir occasionally and keep an eye on the butter. After 4-5 minutes the center will erupt in a caramel color. The butter is now browned. Immediately turn off heat and add chopped sage leaves. They will ‘fry’ in the hot butter and become crispy.
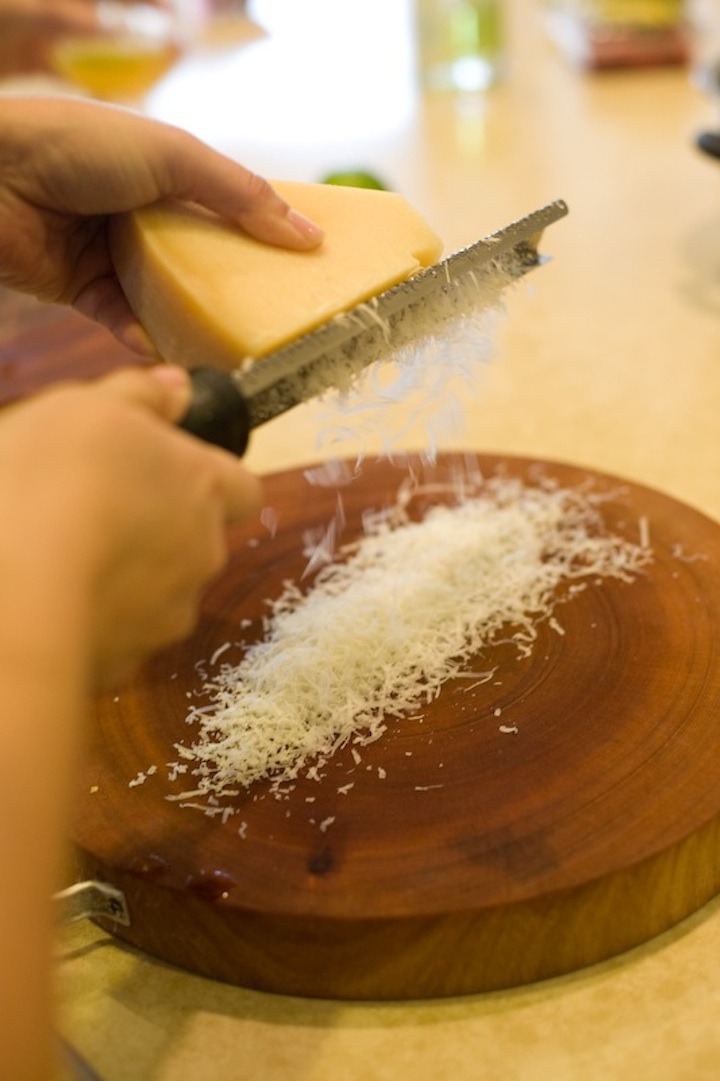
Always grate Parmesan fresh using a microplane.
Put It All Together!
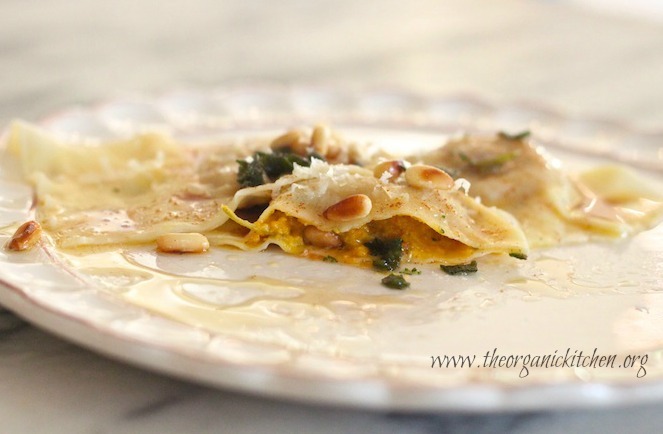
Look at this delectable free form pasta! And that browned butter…and that filling oh my goodness! Now you know why it would be my last request!
The Recipe: Homemade Butternut Squash Ravioli with Sage Browned Butter
Tips and what you will need: always start with a clean organized space and take your time. Pasta making should be relaxing and fun! I use pasta roller attachment for my kitchen aid but you can use a hand crank pasta maker , just know you need a friend to help. If you are cutting your own squash you will need a ‘y’ peeler and a sharp knife. You will also need wax paper. (amazon affiliate links)
I must say before we get started that this recipe is for the cook that loves a challenge! It is a little labor intensive...but I swear it is worth the time investment. Handmade pasta is so delicate and this filling is downright incredible. So put on some good music, clear a work space and if possible grab a friend. Pasta making is more fun with a partner!
- 1 1/2 cups all purpose flour
- 2 large whole eggs
- 3 large egg yolks
- 1 tablespoon olive oil
- 5 cups butternut squash, peeled and cubed (loosely fills cookie sheet)
- 4-6 cloves garlic. peeled
- 2-3 tablespoons olive oil, give or take
- 10 whole sage leaves, added the last ten minutes of cooking
- 2/3 cup of roasted pine nuts
- 1 1/2 cups parmesan cheese, freshly grated (separated)
- sea salt and pepper, to taste
- 1/2 cup butter
- 6 sage leaves, chopped
-
Put 1 ½ cups flour in a large bowl, make a well in the center, add the eggs and oil.
-
Combine ingredients using your hands. This can take a few minutes. Once dough is combined, place on hard surface dusted with flour.
-
Knead, knead and knead some more until dough is smooth and feels like firm playdough, usually 8 minutes or so. (If dough is too sticky add additional flour a little at a time until it's not too sticky, if it's too dry dip your hand in water and flick some water on the pasta until dough becomes more pliable) When dough is elastic and smooth, form into a disk, cover with plastic wrap and chill in the fridge for at least an hour.
-
Preheat oven to 400 degrees. Place rack in upper 1/3 of oven
-
Place peeled and cubed squash and garlic on a rimmed cookie sheet lined with parchment paper. Drizzle with enough olive oil that all squash is lightly glistening, sprinkle with sea salt and pepper, toss. Roast at 400 degrees for about 50 minutes but set timer for 40 minutes, adding 10 sage leaves to pan for the last ten minutes of cooking.
-
When squash is done cooking remove from oven. Allow to cool for a few minutes.
-
Place all the ingredients on the sheet pan, 1/3 cup pine nuts, and 3/4 cup cheese in food processor and mix to a thick paste.
-
Place a large stock pot filled with water and 1 Tablespoon salt to boil
-
Place pasta maker on the left, then sprinkle hard surface with flour (this is where you will place rolled pasta) set a small dish of water and pureed squash filling next to area where the pasta will be, then place a cookie sheet lined with wax paper for finished raviolis on the right. (You will need 3-4 sheets of wax paper)
-
Pasta makers usually have 8 settings. You will start at the widest setting (on my pasta maker that setting is 1)
-
Shape 1/4 portion of chilled dough into a flat disk (put the remaining dough back in the fridge)
-
Run pasta through the pasta machine two times on the widest setting (usually 1) then roll it through twice again on setting 2, then twice on setting 3 etc...working your way up to 7. Stop at the second to last setting (usually 7) and only roll it only once on that setting. The thinnest setting (8) is too thin for ravioli.
-
Place rolled pasta on floured surface. Place butternut mixture by small spoonfuls onto pasta just below the midline, leaving a space of two fingers between each scoop of filling. (see photos above)
-
Dip finger in water and make a ‘U’ on pasta under each spoonful of filling.
-
Fold pasta over and press firmly (using two fingers) in between spoonfuls of filling, then seal pasta under filling (sealing the sides first and then the bottom prevents bubbling).
-
Use a knife to cut into ravioli shapes, placing each ravioli onto cookie sheet lined with wax paper in a single layer, separating each layer with more wax paper.
-
When all pasta and filling are used, set aside.
-
Place one stick butter into a small pan on medium heat, butter will melt, then begin to bubble up. Stir occasionally and keep an eye on the butter. After 4-5 minutes the center will erupt in a caramel color. The butter is now browned. Immediately turn off heat and add chopped sage leaves. They will 'fry' in the butter and become crispy.
-
Gently place raviolis in boiling water, it helps to have two people do this quickly. Cook for three minutes.
-
Gently strain in colander, do not rinse.
-
Place raviolis in large bowl, pour browned butter over ravioli, sprinkle with sea salt and garnish with remaining pine nuts and Parmesan cheese. Toss. Serve.
MAY I PLEASE ASK A FAVOR?
We small bloggers need all the help we can get. Subscribing and sharing on social media is very appreciated!








Love, love, love this! Thanks for the tutorial, I’ve always wanted to make ravioli anything but was intimidated by the ravioli. Butternut squash & browned butter ? Surely it doesn’t get any better than this, YUM!
Thank you Jeanie! As I said in the post it is my favorite meal. I am sure you can do it. Don’t be intimidated:)
This looks amazing. I will have to adjust dough to make it gluten free but I think it is doable. Thank you for sharing it!
Thanks Ilona! I have never made gluten free pasta myself. Check out Gluten Free Goddess, she may have a recipe. Good luck!
I love love love all your recipes. I am dying to try the butternut raviolis. I love “fried” sage. A great little Italian restaurant in Encino used to make the best raviolis topped with “fried” sage. Thanks for sharing all these mouth watering ideas!
Thank you Hayley! I am so glad you love my blog. Your comments made my morning!
If I wanted to make this at Kristin’s, how can I make it nut free for her kids who are allergic to nuts? BTW, I pinned this. Butternut squash ravioli is my favorite dinner at my local italian restaurant. Can’t wait to try.
Just leave the pine nuts out:)
I made this tonight! Only my 2nd time making pasta and my 1st attempt at ravioli. It looked nothing like the picture, but holy cow, was it good! I do wonder what setting should the pasta roller be on? I ended at 4, which is what the kitchenaid book said for ravioli but it seemed too papery. Is 3 too thick? I’m just learning the whole pasta machine thing, but it is fun!Thanks for an easy recipe to try. There isn’t much I love more than roasted butternut, except maybe sweet potatoes. Is there a filling recipe with that?
Hi Bonita! Glad it came out well. In the recipe I posted I instruct to run the pasta through the roller twice on each setting, starting at setting one and ending at 6. Then running it through just once on setting 7. It is a delicate pasta. Glad you took on such a challenge and had success!
I just chickened out at 4, it seemed so thin. I’ll trust it more next time, maybe.
Trust me darling. One time I stopped at six because I thought I want the pasta a little thicker this time. Not nearly as good! In this case, the more delicate the better! (but don’t go to 8 or it will fall apart)
A few prep questions: can the filling be made ahead of time, before the pasta dough is made/ready? And can the uncooked ravioli be frozen?
Hi Amanda,
Yes you could make the filling ahead of time but I would reheat it before filling the pasta. I have never frozen the uncooked ravioli but some of my students have and they say it works well!
I made this recipe 3 (!) times this week and it is absolutely fabulous. I did not change anything in the recipe except….. I used wonton wrappers instead of making my own pastry. Thank you so much for this wonderful recipe!
I just tried a gluten free pasta recipe from Paleo. It was absolutely amazing!
I haven’t made homemade gluten free pasta yet. Glad you liked the one you tried. Gluten free pasta can be tricky:)
My first try at homemade pasta & it turned out really good! The photos definitely helped. Thank you!
So glad. In this case photos were a must! It’s hard to follow the instructions with out them. Thanks Erica…ps every time you do it you will learn something new! ~ Linda
What kind of flour do you use?
I use organic unbleached all purpose flour most of the time but occasionally I will only have bread flour and have used that too. I have never noticed a difference:)
Lovely recipie. Home made pasta, never go wrong & I am going to try your filling next time.
In Italy, we use “Semola di grano duro” (flour of durum wheat or semolina). It’s a slight yellowish flower, but belive me it’s better than taste than the white flower & healthier too.
That’s the soft wheat flour, right? The best ravioli I have ever had was in Italy, of course! It was with truffles–to die for! I am going to try this recipe.
I just use all purpose white flour for this recipe:)
This was easy, although obviously a bit time consuming, but truly delicious. I have made it once and we are now having people around for dinner and this is what I’m making. Thank you 🙂
Definitely takes a bit of time but so worth it! Thank you, glad you love it too!
I just wanted to make sure I was reading this post correctly, do you fry the ravioli in brown butter and then boil?
Hi Kendra, no you weren’t so I am glad you asked! You add the sage leaves to the browned butter for frying. You boil the pasta and then pour the browned butter over it:)
Did I overlook oven temp for roasting squash and for how long?
Hi Pauline, yes you did. That information is included in the recipe but not the description. Scroll past the description to the actual recipe and you’ll see 400 degrees and 50 minutes:)
Can any of this be made the day before, and reheated? I’m thinking of doing this as an appetizer for thanksgiving this year but it’s pretty time consuming when I’ll already have a lot of other cooking to be doing.
Hmmm I wouldn’t make it the day before. Fresh pasta does not last that long. What you could try, although I have never done it with this recipe, is make it ahead and freeze it. Then just boil it and serve:)
This article provdes clear idea for thhe new visitors of blogging, that really how to do
blogging.
This was the first pasta recipe I tried using my new Kitchenaid pasta attachment and it’s a keeper! My husband, a meat lover, even enjoyed this recipe and didn’t complain about the coating of flour left on the counter and floor. He even acknowledged the ravioli is tastier than what we’ve had at restaurants. It’s time consuming, but worth it. Thanks for the photos–it helped walk me through all the steps!
Wow! Love hearing that! I think it’s worth it too and I find the pasta making kind of therapeutic:)
I had a package of Costco butternut squash ravioli….and just couldn’t figure out what to do with it! I made the browned butter exactly as you instructed. It was SO YUMMY! Now I’m going to put a Kitchen-Aid pasta maker on my Christmas list, and make my own ravioli next time!
I have never tried the costco ravioli. Is it good?
Looks like the pine nuts are toasted? Sounds yummy and am going to try it.
yes they are:)
I love this recipe! I was looking for a recipe for this after I had the evol. brand, and I’m so happy i found this one. Although, I was wondering, could I just use a rolling pin to roll out the pasta dough.
You can! It’s just trickier to get even.
Thank you!! It might be a bit more of a pain, but, hey, at least I get a workout out of it, haha!
I am interested in trying this recipe, but wondered about the ingredients listed for the squash filling. You list 10 sage leaves, 2/3 cup pine nuts and 1 cup parmesan, but I only saw using 8 sage leaves,1/3 cup pine nuts and 1/2 cup parmesan in filling. Am I overlooking something?
Hi Bruce! Yes, you must have missed the instruction to garnish with the remaining cheese and pine nuts:) Note: The amount of sage used is up to personal preference. Some like less, some like more. Honestly, I never even count. I just throw in however much I feel like. It’s more of a guideline than an exact amount. Hope you love it!
These are absolutely delicious! They turned out great 🙂 One little conundrum I had though, was the paper towel bit when laying the raviolis on the cookie sheet. The wet paper towel works like a charm, but if it’s your first time making ravioli & you’re not as fast as one might hope, the paper towel dries and sticks. Needless to say some of my raviolis became dumplings. Beginner tip: wax paper works better between the layers!
But, awesome recipe! Thanks 🙂
I have never had a problem but wax paper is a great suggestion…but it won’t keep the raviolis from drying out. Hmmmm…
I’m making this for guests today. The squash tastes fantastic! I assume you use salted butter?
I expect this to be a huge hit, thanks for the recipie!
This is one of my dream dishes, too! I made it over the weekend, and hubby and I both swooned over it. Thank you for the recipe; so glad I’ve found your lovely website!
Hi Linda! How long did it take you, in total, to make the recipe (all of the ravioli and the sauce), as I’m thinking of using this recipe for a competition, and would like to know if i can finish within the time. 🙂
Hi Ben. Hmmmm let’s see…15 minutes to make the pasta, and then an hour to let it rest while squash cooks, 30 minutes to roll and fill, sage sauce 5 minutes…so an hour and 45 minutes to 2 hours start to finish! Practice first and it could go faster. Good luck!
Made your roasted butternut ravioli this afternoon with a squash I picked from my garden this morning , followed your recipe it was fantastic!! My family loved it, the pasta was lovely and tender and the filling was delish?
yay!!! You are brave. It is a bit of work but so worth it. I am impressed. Thanks for letting me know!
Was I supposed to remove the garlic before processing!?
Nope! You leave it in!
What about the sage that you added in the last 10 minutes? Process that too?
Yup. Everything on the cookies sheet goes into the processor. Thanks for the question!
Wow this is a labor of love and it looks sensational! I’ve never made my own pasta – maybe nows the time!
It really is worth the effort!
Wow! I can die now. I have the Kitchenaid pasta maker and am always looking to use it, so when I found your recipe, with my fave veggie, I was super excited! I made it today and had two leftover. They’re hidden in the fridge for me, only me! You’re right about the labor intensive part but I will not shy away from doing these again! So, so yummy! My new favorite. Lucky for me our grocer has butternut squash year round! Thank you so much!!
I am so glad to hear that! It is a family favorite for sure! So glad you enjoyed the recipe.
I WANT SOME!!!! Seriously making me so hungry right now. I’ve never made my own ravioli, but filling it with butternut and sage sounds divine!
And it’s fun to make! The kids love to help.
This looks so good! I love the combination of the squash and the pine nuts too. Yummy!
wow this ravioli looks great! Love the step by step pictures!
So necessary with this recipe!
This would be a fantastic weekend cooking project, and so worth the effort! I love butternut squash ravioli anyway, but THIS. I think that my pre-electric-chair meal may have just changed.
So what was your pre-electric chair meal before? Do tell:)
Wow can’t get more homemade than this. I bet it’s totally worth it!
It doesn’t get much better than homemade pasta, does it!? These sound delicious, such a classic flavor combo – and they look so elegant!
The way you started this post LOL!!! Love it! And I totally understand why, this looks amazing!
And it’s 100 percent true lol
This looks amazing! I love that it includes so many vitamins and nutrients. My kids would eat this up in no time and never know the difference.
My one year old grand baby went crazy for it!
What an amazing tutorial. I even would attempt to try this.
I am sure you would master it in no time!
I love making fresh pasta…yours looks great
Thanks! It’s so fun to make!
Butternut squash ravioli is a favorite of mine (or used to be before going completely gluten free) but this sure is bringing up a lot of happy memories.
I wonder if this recipe would work using cappello’s lasagna sheets???
Great tutorial! You won’t believe it but this is my favorite dish of all times! 🙂 I must try your version, too!
I totally believe it!
Excellent. I used Italian 00 pizza flour, eggs from our chickens, sage from the herb garden and butternut squash from last summer’s veggie garden. Beautiful outcome. Thanks!
Oh my. I am so jealous. If this recipe could be better, you just made it better. Lucky you!
Just made fried #Gluten-Free #ButternutSquash #Ravioli #Appetizers with my Arnco Ravioli Roller and Cookie Cutter. They didn’t last long enough to get a photo. Modified your Recipe, and would like to share it and post on our website,Facebook and Twitter pages.
I am so glad you liked the recipe! I welcome sharing and shout outs and appreciate you linking back to my website for the original recipe. So glad to know the GF version works well!
I am so happy you loved the recipe! I always appreciate a share and link back. Thank you. Your site is beautiful by the way 🙂
how many servings does this recipe make? Thanks.
It makes six servings.
how many individual raviolis does this make? I’m a calorie counter :S
I have never counted. But it fills at least two cookie sheets…so 40-50??? It also depends on how big you make them.
Thank you so much.. I just needed a general idea. Can’t wait to try this recipe. 🙂
Hope you love it!
When we have roasted butternut squash, we cut it in half, clean it and then roast. When done, we just scoop it out. Any reason to go through process of skinning and cutting into pieces?
I suppose you could try it. In my experience the squash is much more “mushy” that way so your filling might not be as solid. Also I like the caramelization that takes place when you cut the squash into cubes and then roast. I am curious to know of it would work though. If you do it please let me know how it goes!
thanks for the recipe – it was great – but placing the ravioli on a moist paper towel ruined them all and they all stuck to the paper – very disappointed, but i will try again and adjust to not let this happen.
Interesting. In all the years I have made this recipe that has never happened to me! And it was the method I was taught in cooking school. Now I am very curious why it happened to you. I hope you don’t mind if I ask a couple of questions so I can try to figure it out. I am wondering if it was a pasta problem or a wet paper towel problem. Was the pasta sticky at all before setting it on the damp towel? Was it sticking to your hands or the counter as you stuffed it, folded it, cut it etc? Or was it dry and coated with flour? Did you squeeze out almost all the water so the paper towels were just damp or were they more wet? If they were too wet I could see them sticking a bit. And I almost wonder if the kind of paper towel might make a difference??? Hmmmm. I am surprised as I taught this recipe for years in cooking classes and that never happened. So sorry it happened to you. Hopefully we can figure it out.
My husband made these for my birthday dinner. We got the pasta made and ravioli assembled with no problems at all. We thought it sounded strange to put moist paper towels between layers instead of wax paper, but did it anyways since that’s what the recipe said. We layered everything and then wrapped the sheet they were on in cling wrap as we weren’t cooking them for a couple hours. When it was time to make them, we found that the paper towel had stuck to ALL of the raviolis, and when we tried to get them off it just tore the pasta and the filling came out everywhere. We tried repairing them but the vast majority are unsalvageable. Very disappointing as the filling is delicious. Lots of work for no reward!! Next time we will follow our gut and use wax paper, especially if not boiling them right away.
That is very disappointing and I am sorry that happened to you. I have never left them sitting on the paper towels for longer than a few minutes. I have never tried wax paper, and honestly I have only had one other comment saying paper towels were a problem in the four years this recipe has been on my blog. And in the ten years I have been making this recipe, I personally have never had a problem. I will try the wax paper, if it works well I will add it as an option. Thanks for letting me know and again, so that happened to you.
This recipe inspired me to make homemade pasta for the first time. So worth the effort!
Oh I am so glad! I love this recipe too.
Finally, a butternut squash ravioli recipe that does t have goat cheese in it. I want to make this very soon! Plan to make it for Christmas. As my nephew is a vegetarian teenager and finding something new for him to eat is a challenge. You show making the pasta by hand, rather than using your Kitchenaid. I have the Kitchenaid and pasta roller attachment and wonder why or if you can knead it/mix it, in the Kitchenaid with the dough hook?
Again, thanks for this beautiful recipe! I think I am going to use my InstantPot to cook the squash.
Hi Karen, you know I tried the hook once and the texture just wasn’t the same and the pasta tore a little when rolled, and since I learned to do it by hand that’s how I am most comfortable. You could use the hook and see how it goes for you. I am all for easier and saving time!
i just tried this today…omg so good, my family loved it. thanks for the recipe.
Oh I am so glad! I am always impressed when someone takes on a recipe of this caliber! Good for you, so worth the effort!
Hi! I found your recipe, as I’ve bought a lovely butternut squash and was hoping to make ravioli out of it. Question: do you usually get five cups of squash cubes out of one medium-sized butternut squash? I was trying to gauge.
Hmmm that is a tricky question so I googled:) I think a 2 pound squash usually yields 3 cups.
Thanks, so you typically use 2 squash for this recipe? Just wondering. I may scale it to half.
No, usually just one large one. But you could get two smaller, they are easier to work with:)
Hi there! Just made the filling and grabbed a handful of my fresh sage off the plant. The leaves are small, as it is growing in a pot outside and I am lucky if I still have usable sage for thanksgiving lol. But got lucky this year. Thus, I used more sage, since the leaves are smaller. Also, I didn’t have any pine nuts so I took some walnut halves I had in the fridge and toasted them in the cast iron pan. Whizzed up all ingredients in the food processor, expecting to have to add salt. But surprisingly it doesn’t NEED salt! Will be putting these together after my pasta dough rests and I get it rolled out. But I must say again, the filling IS AMAZING and it will be on my Christmas dinner menu for the vegetarians whom are coming. Thank you so much!
Yay! This makes me very happy. Merry Christmas and enjoy the food!
This is an awesome dish!
Just wondering how many pieces of ravioli is recommended per person and any other serving suggestions pls (ie what to serve the ravioli with)? TIA
Thanks! I usually give people about 6-7 raviolis if serving as a main course, 3-4 if serving as a side dish. I usually serve it with my “house salad” because it’s so simple. If you put ‘house salad’ into the search bar on my blog it should pop right up.
This would be a fantastic weekend cooking project, and so worth the effort! I love butternut squash ravioli anyway, but THIS. I think that my pre-electric-chair meal may have just changed.
I’ve been cranking pasta by hand for years and I’ve never needed a friend to help – in fact, it never occurred to me that two people would be better than one.
Perhaps I am just very uncoordinated Hans:)
I have now made this several times and it’s is definitely a favorite in our house!! Thank you for the amazing recipe!! I usually do make them alone but I can see how a helping hand could work out! I usually leave them on parchment paper and place them in the freezer until I am ready to boil them. They don’t stick after that!!
Yay! I love to hear that! You are a rock star doing this alone. I have done it many times as well and it’s easier with two sets of hands 🙂
I used a different pasta recipe but the filling and sauce is delicious. I made this for my daughters Christmas dinner as she is vegetarian but the meat lovers tried it and loved it. I am making it again for dinner tomorrow night when a family of vegetarians are coming to dinner. I know it will be a hit!
Fabulous! Thanks for the comment!
I only have ground sage, not fresh. Can I use ground sage fot the brown butter sage sauce?
I guess you could but honestly I would even know where to begin with a measurement. If you try it, please let me know how it works out:)
Such a wonderful recipe. When we lived in CA.,we’d make the trip to Half Moon Bay to a Restaurant called Pasta Moon that made butternut squash ravioli. We now are on the east coast and I crave this food. Your recipe is great and satisfies that craving. Thank you!
Thanks Jeanette! I have to say that this recipe is so good I am hard pressed to find one i like as much in a restaurant! I’ll have to try Pasta Moon!
can I make and freeze these ravioli prior to making them?
I have not done it, but one of my viewers did and said it worked. No promises from me though since I have haven’t done it myself:)
This was the first pasta recipe I ever tried, and it came out AMAZING! The way you broke down the instructions really took away the intimidation factor, and the flavors were perfect!
I am so glad! And impressed that you gave this recipe a try on your first shot. I am so happy you loved it. It’s my favorite!
Hi I can’t wait to make this! Would it be okay to put them in the freezer for a few hours until I am ready to cook them? Or can I refrigerate them? I am making a few coursed dinner and I want to just be able to drop them in boiling water when I am ready for them.
If it’s only for a few hours I wouldn’t freeze them. I would place them in a single layer in zip lock and keep them in the fridge. That said, I have never done this, so you may want to experiment before trying them at a dinner party. Good luck and please let me know how it works out:)
I am making this for the second time tonight for my mom’s birthday. Love this recipe!!
Kerri, you are a good daughter! I hope your mom loves it. It is absolutely my favorite meal! Thank you for letting me know how much you like it.